RabbitMQ configuration for acceptance tests
In this article I’ll show how to use RabbitMQ exchanges and queues to trace specific messages. This technique can be used for example in acceptance tests.
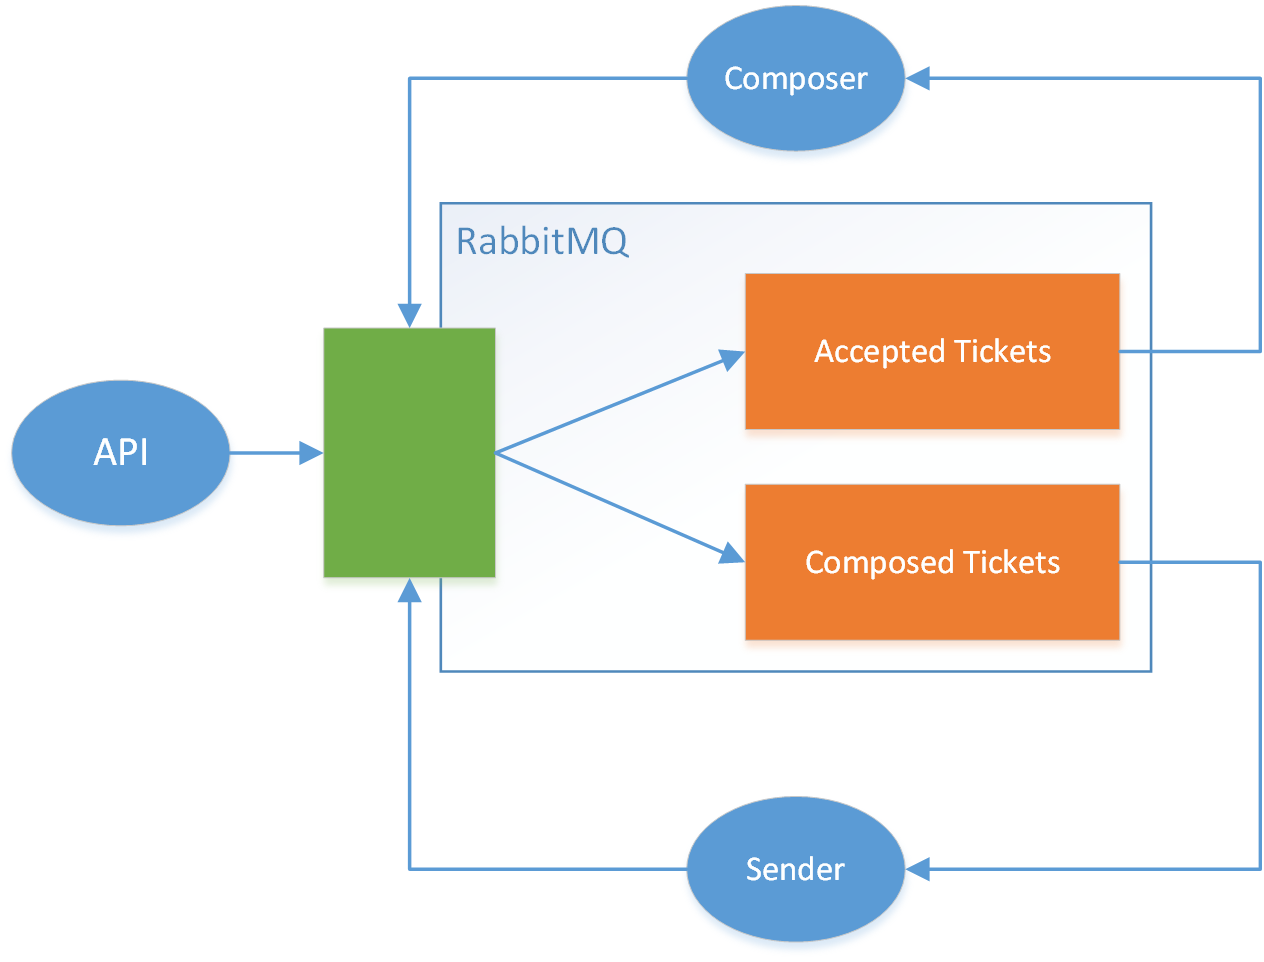
At OpenTable, our mailing system uses RabbitMQ to pass messages between worker services. The configuration is depicted below.

Requests arrive to API and which creates a message and sends it to the main exchange (green rectangle). Then, the message is routed to Accepted Tickets queue. Then, message is consumed by Composer. Email is being created and attached to the original message which is send back to the main exchange. Now, message is routed to the Composed Tickets queue, and consumed by Sender. When email is send message is sent to the mail exchange and is routed to Sent Tickets queue (not in the picture).
This is just a simplified version of the real process. I omitted scenarios when
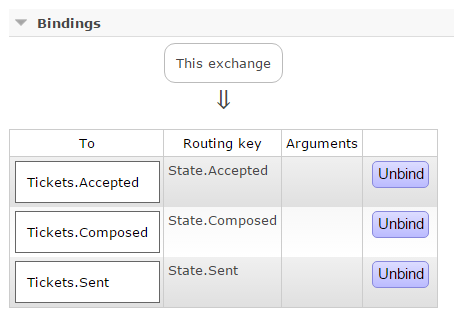
composition or sending fails. Below there is a RabbitMQ binding configuration
of Tickets exchange:

Tracing messages
Testing message-based (asynchronous) systems may be difficult, especially when it comes to end-to-end tests. Let’s define what problems do we want to solve:
- We want to inspect the content of messages flowing between API, Composer and Sender.
- If possible we don’t want to modify existing applications. If not, small changes are allowed.
- We want to allow tests to be run in parallel - we don’t want to mix up tickets from different sessions.
Message headers
To be able to run tests in parallel and trace proper messages we need to assign some kind of id to a test and messages being produced by services as a result of this test. The id have to be carried with the messages and the services producing messages have to copy this id from one message to another. Seems like a lot of work, but it isn’t. We don’t want to modify bodies of the messages, that’s why we will send the id in message header. Below there is a body of a simple worker service (Composer).
var factory = new ConnectionFactory {HostName = "localhost"};
using (var connection = factory.CreateConnection())
{
  using (var channel = connection.CreateModel())
  {
    var consumer = new EventingBasicConsumer(channel);
    consumer.Received += (model, ea) =>
    {
      var body = ea.Body;
      var message = Encoding.UTF8.GetString(body);

      Console.WriteLine("Received '{0}'", message);

      var outMessage = message + " Composed";

      var properties = new BasicProperties {Headers = ea.BasicProperties.Headers};
      channel.BasicPublish("Tickets", "State.Composed", properties, Encoding.UTF8.GetBytes(outMessage));
      channel.BasicAck(ea.DeliveryTag, false);
    };

    channel.BasicConsume("Tickets.Accepted", false, consumer);

    Console.WriteLine("Press ENTER to stop consumming...");
    Console.ReadLine();
  }
}
Composer consumes messages from Tickets.Accepted queue, modifies body by adding
“ Composed” suffix and sends it back to the Tickets exchange. Notice that
headers are copied from source message. This would be the only code change
that we would have to do in the production code.
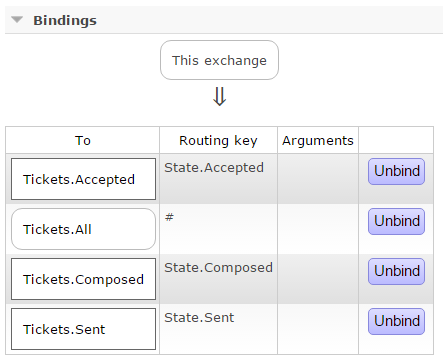
Header exchange
Before we write a test runner we need to define another exchange of type “headers”
which would allow us to filter messages by header variable. We also need to bind
this exchange to our main Tickets exchange. Notice that routing key is #
which means “all messages”.

Test runner
Let’s write simple test runner. It first generates random id and displays it
in the console window. There are few important code pieces here:
1. We use DeclareQueue without parameters. It would create temporary queue
with random name. When the application quits the queue would be removed.
2. We bind this queue to our new exchange Tickets.All. Because the type of
the exchange is “headers” we don’t use routing key. Instead we define SessionId
header for this binding. All the messages with matching header would be routed
to our temporary queue.
3. When publishing test message we use the same header as in the binding.
var sessionId = Guid.NewGuid().ToString();

Console.WriteLine("TEST RUNNER started.");
Console.WriteLine("SessionId: {0}", sessionId);

var factory = new ConnectionFactory { HostName = "localhost" };
using (var connection = factory.CreateConnection())
{
  using (var channel = connection.CreateModel())
  {
    var queue = channel.QueueDeclare();
    channel.QueueBind(queue.QueueName, "Tickets.All", string.Empty, new Dictionary<string, object>
    {
      {"SessionId", sessionId}
    });

    var consumer = new EventingBasicConsumer(channel);
    consumer.Received += (model, ea) =>
    {
      var body = ea.Body;
      var message = Encoding.UTF8.GetString(body);

      Console.WriteLine("Received '{0}'", message);
      // Assert message here

      channel.BasicAck(ea.DeliveryTag, false);
    };

    channel.BasicConsume(queue.QueueName, false, consumer);

    // Publish test message

    var properties = new BasicProperties
    {
      Headers = new Dictionary<string, object>
      {
        {"SessionId", sessionId}
      }
    };

    channel.BasicPublish("Tickets",
      "State.Accepted",
      properties,
      Encoding.UTF8.GetBytes("Message accepted"));

    Console.WriteLine("Press ENTER to stop consumming...");
    Console.ReadLine();
  }
}
Working example
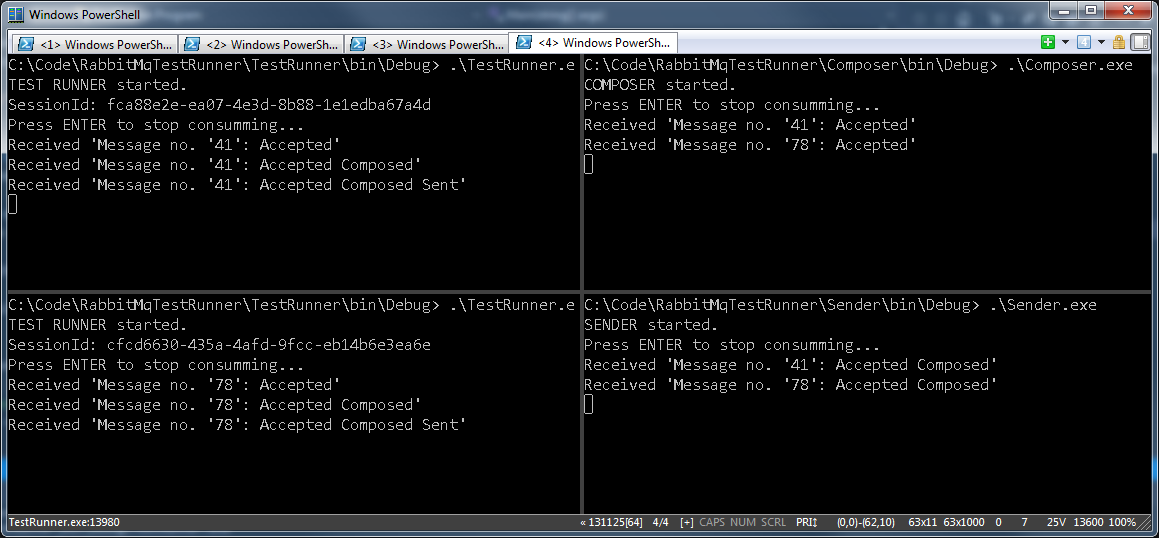
Let’s see it working. To do that we need to run Composer and Sender. To show that messages are not mixed up I run two instances of test runner. To distinguish messages I modified the code a little to contain random number in the message.

Here you can see the bindings to temporary queues:
